Manager
Managers are responsible for creating and updating users, events, teams, and classes.
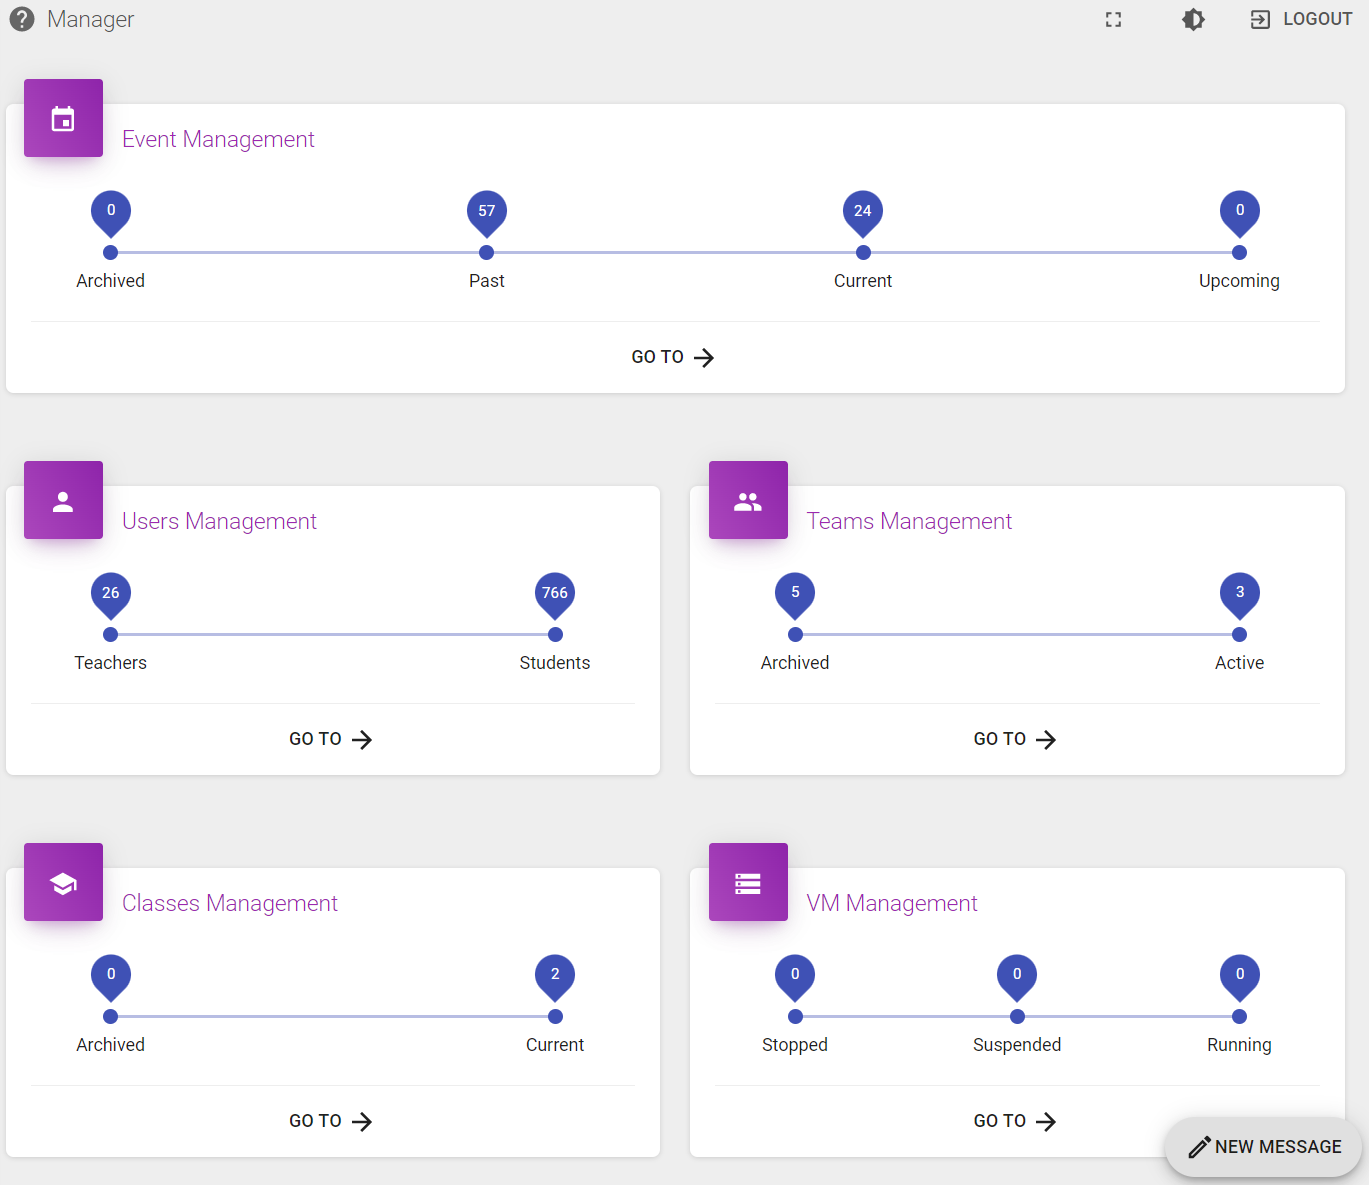
Classes Management
A class is a collection of teams. It represents a semester at a University, or a series of events.
A class has the following properties:
- name
- description (optional)
- image (optional)
- start date
- end date (optional)
- list of assigned teams
- list of assigned teachers
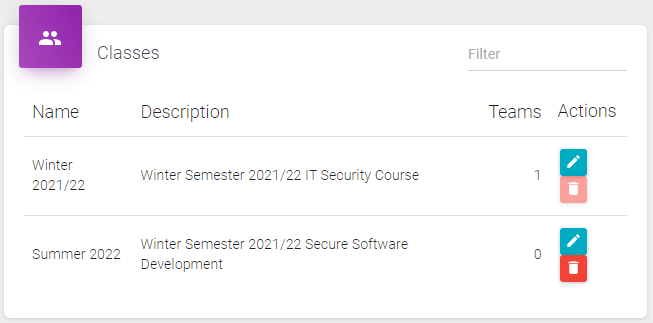
Class List
This screen shows a list of all available classes in the system, running or not. Classes can be edited using the  button, and deleted with the
  button. Deletion is only possible if the class does not have teams assigned (anymore).
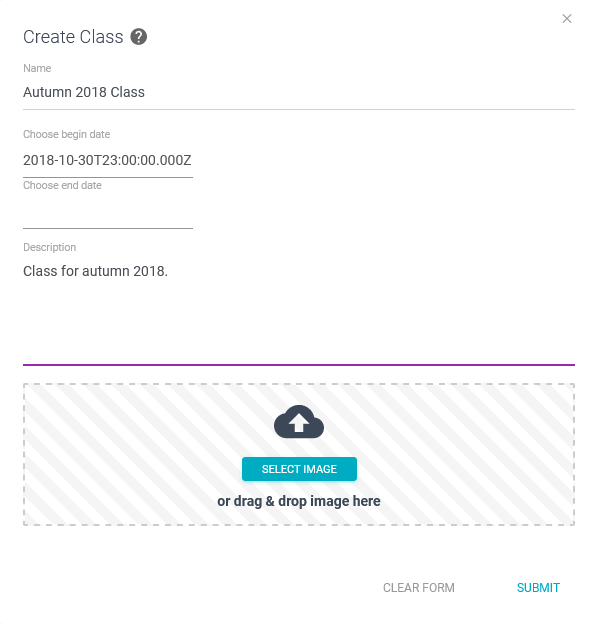
Class Creation
New classes can be created by clicking the  icon on the class list screen.
A popup appears, where all properties of the new class can be entered.
- Name, start date and description are mandatory.
- End date and image are optional.
Push submit once you have completed the entries. In case of validation errors, affected input fields will be marked red.
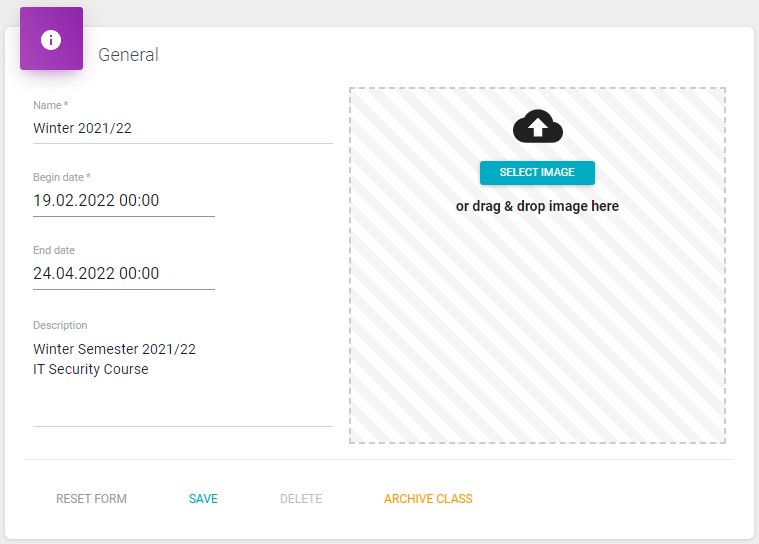
Class Details
The class details can be opened using the  button in the class list. On this screen, the properties of the class can be edited (name, start date, end date, description, and image).
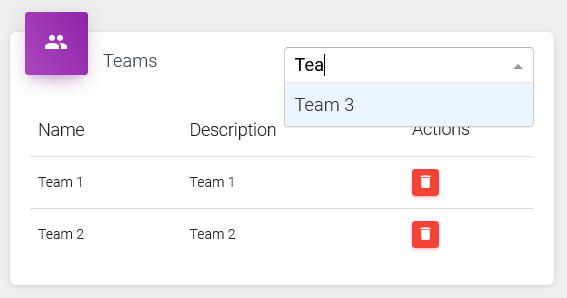
Further, existing teams can be added to this class, and removed again. To add a class, start typing its name in the search box, and click it in the dropdown appearing. To remove a team again from the class, use the  button.
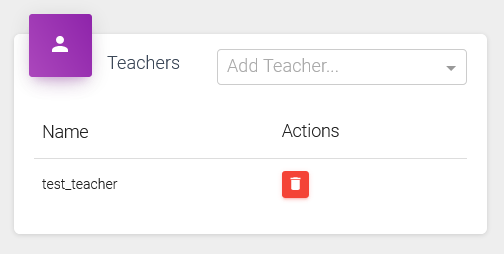
Finally, one or more teachers can be added to the class. This is just for information purposes, and does not have any impact on the logic or access rights.
Teams Management
A team is a collection of users. One of the team members can be chosen to be the team leader. The team is assigned to mandatory or optional events. Each user assigned to the team can access these events, an register for them. A team has the following properties:
- name
- description (optional)
- image (optional)
- team leader (optional)
- list of assigned events
Team List
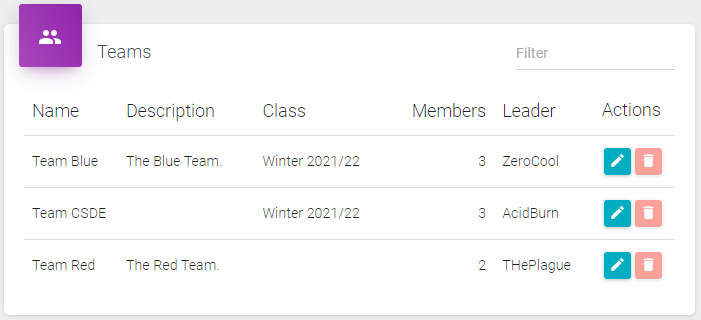
This screen shows a list of all available teams in the system. Teams can be edited using the  button, and deleted with the
  button. Deletion is only possible if the team does have neither events nor users assigned (anymore).
Team Creation
New teams can be created by clicking the  icon on the team list screen.
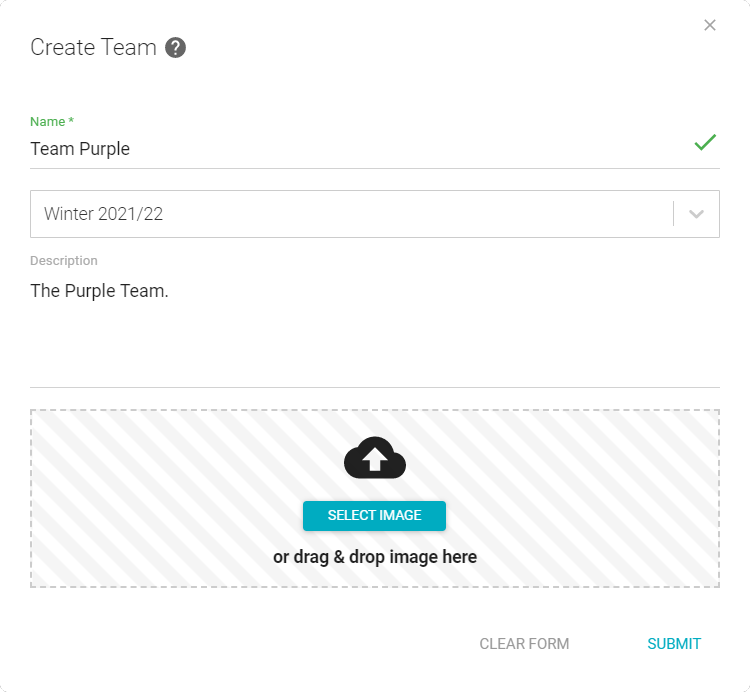
A popup appears, where all properties of the new team can be entered.
- Name, class and description are mandatory.
- Image is optional.
Push submit once you have completed the entries. In case of validation errors, affected input fields will be marked red.
Team Details
The team details can be opened using the  button in the team list. On this screen, the properties of the team can be edited (name, class, description, and image).
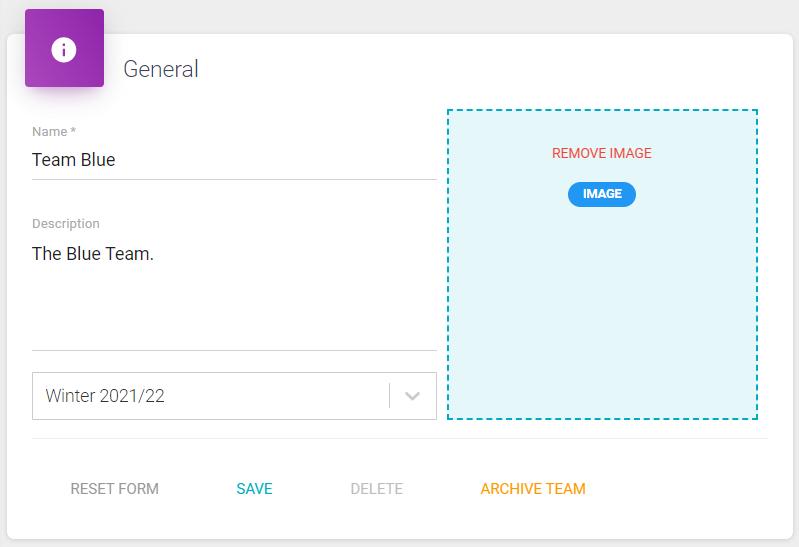
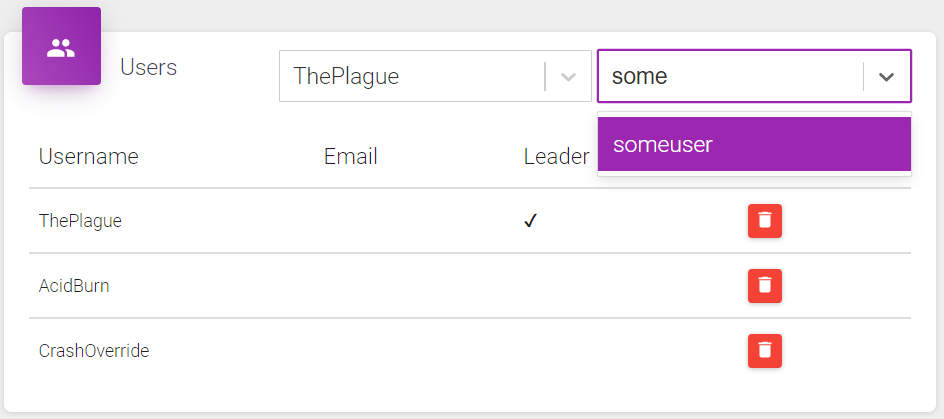
Further, users can be added to this team, and removed again. To add a user, start typing his name in the search box, and click it in the dropdown appearing. To remove a user again from the team, use the  button.
One of the users can be assigned the team leader role. To do so, simply select the user in question, in the team leader dropdown.
Event Management
Event managers can create new events and update or delete existing events in the event management section.
- name
- description (optional)
- image (optional)
- start date and time
- end date and time
- one or more assigned teachers
- list of assigned teams
- list of registered users
Event Overview
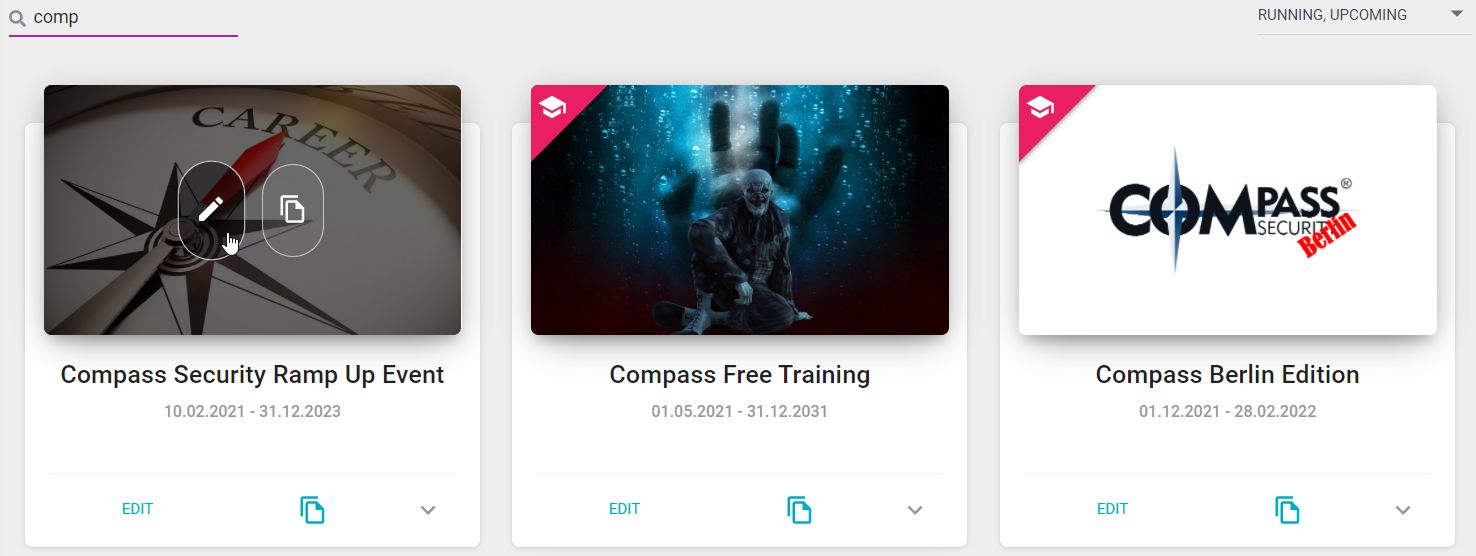
Thes first screen in the event management shows an overview of all available events in the system. Events can be edited using the EDIT link and cloned with the  button. In addition, new events can also be created here.
Tip
By simply hovering the mouse cursor over an event, the operations edit and clone can be performed as well.
Event Creation
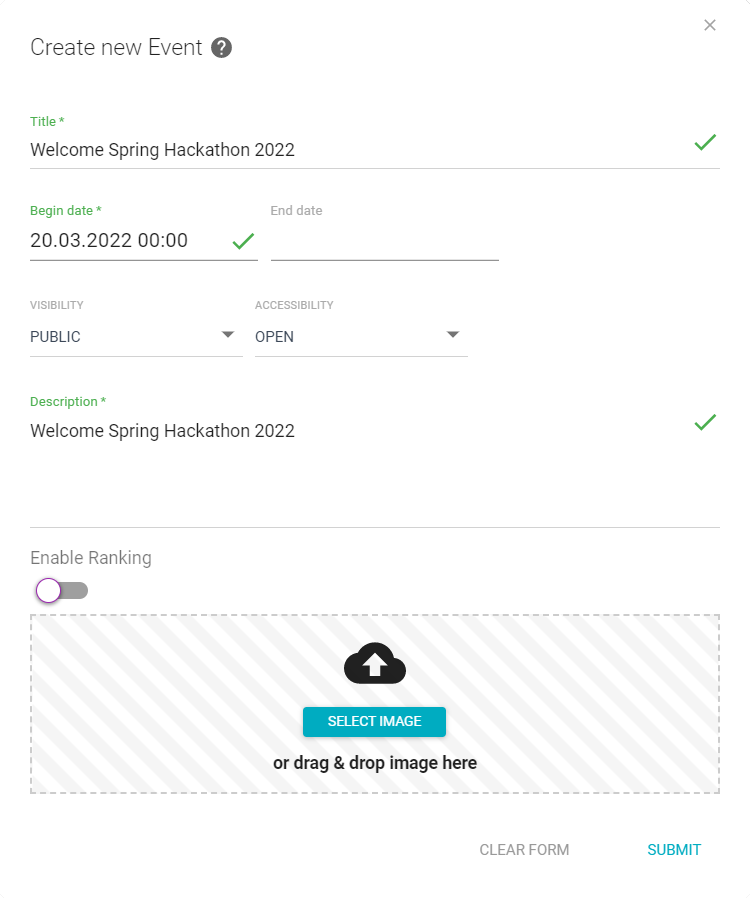
New events can be created by clicking the button with the plus icon on the event list screen.
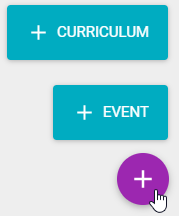
Different types of events can be created.
| Type | Description |
|---|---|
| Event | Basic event containing units like theories, challenges and quizzes. |
| Curriculum | Used to group multiple nested sub-events. A curriculum can contain different types of sub-events, like basic events and exams. |
Tip
Exam events are simple basic events with a time limit. The duration of the exam can be specified in the event details.
The create curriculum and basic event screens are similar. The only difference is that for a basic event the ranking can be activated. All general event details can be modified after creating the event as well.
Event Editing
By editing an event the details can be managed.
Depending on the type of an an event the properties and sections displayed may vary. In general, the screen to edit event details is divided in the following sections:
| Section | Description |
|---|---|
| General | Basic properties of the event – set when a new event is created. |
| Units/Sub-Events | Challenges, theories, and quizzes belonging to the event or sub-events belonging to a curriculum. |
| Users | Users and teachers assigned to this event. |
| Teams | Teams which can view and participate in this event. |
General
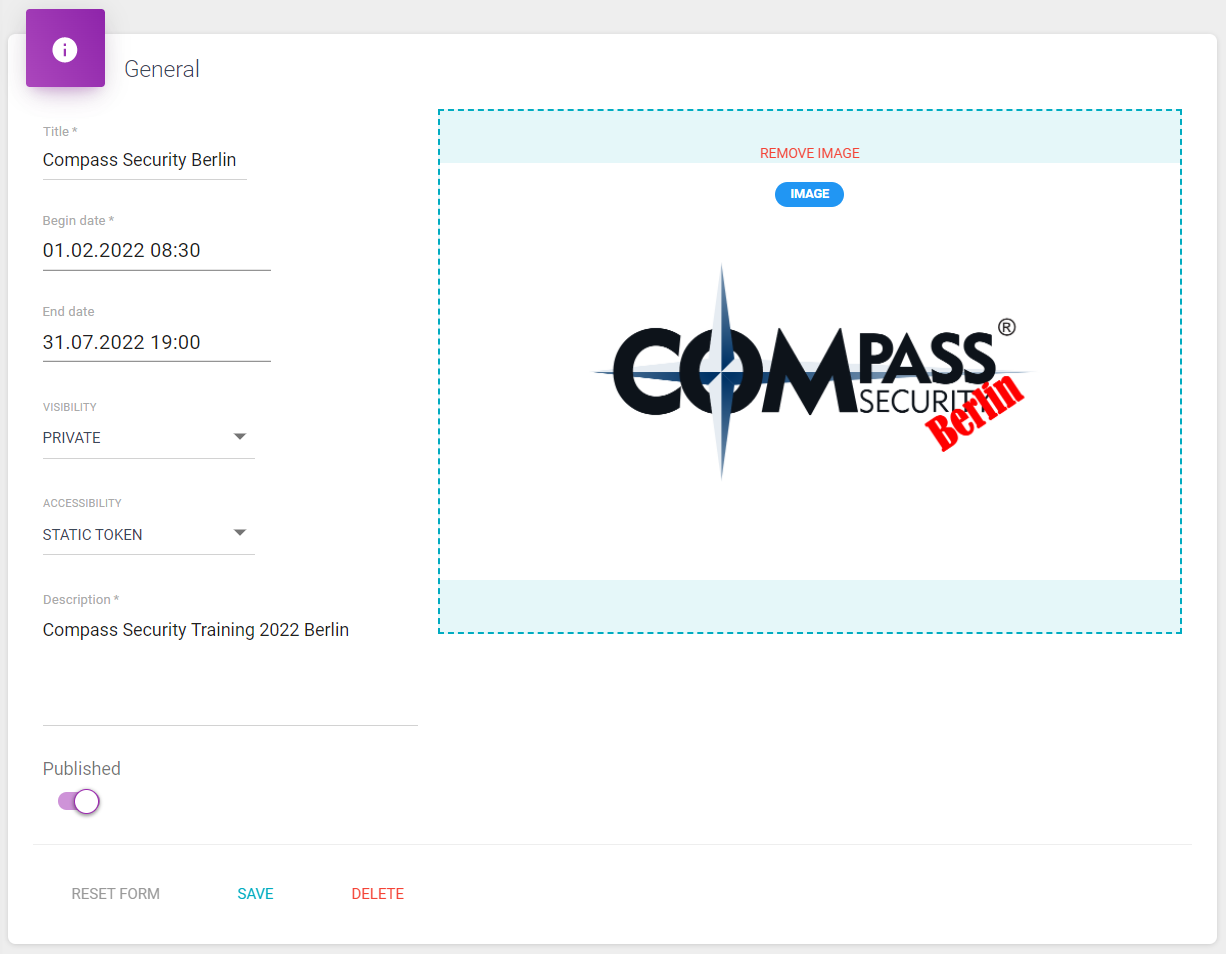
The General section allows to define the basic properties for an event. All types of events have the following properties in common:
- Title
- Begin and end date/time
- Visibility
- Public: visible for everyone.
- Private: visible only for members of the event.
- Accessibility
- Open: everyone can join the event.
- Static Token: secret token needed to join the event.
- Voucher: voucher is needed to join the event.
- Scoring Mode (this option can only be set on events that contain challenges)
- Static: a fixed score is assigned to each challenge.
- Dynamic: the score is calculated based on how many percent of the total participants solved a challenge. You can also set additional parameters and preview the points, when clicking on the settings icon besides the scoring dropdown.
- Description
- Published
- Only published events and sub-events can be joined.
- Disable student communication
- If enabled, no notifications or emails 8(e.g. about new gradings) will be sent to participants.
- Number of Examiners
- The numbers of teachers that need to grade a solution before it is considered as graded. This is normally 1, but for final exams if needed you can set it for example to 2 if two persons grade the same submission.
- Image
Note
Some properties are inherited from the curriculum to the sub-event. For example, if no end date is set in a sub-event, the date from the curriculum is automatically adopted. Assigned teachers are also inherited, but cannot be overwritten in a sub-event.
Info
Not all combinations of visibility and accessibility are allowed.
For Basic Events (sub-events) further options can be set:
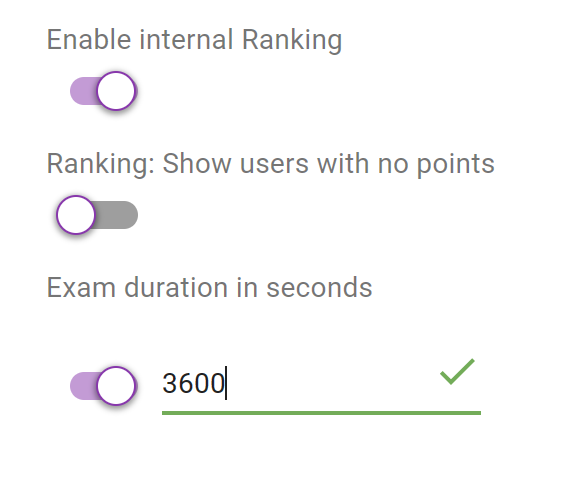
- Ranking can be enabled and disabled
- Ranking: Show users with no points this shows also users with 0 points in the rankings
- Exam mode can be turned on and off
- Exam duration in seconds can be set
Event Units
(for basic events)
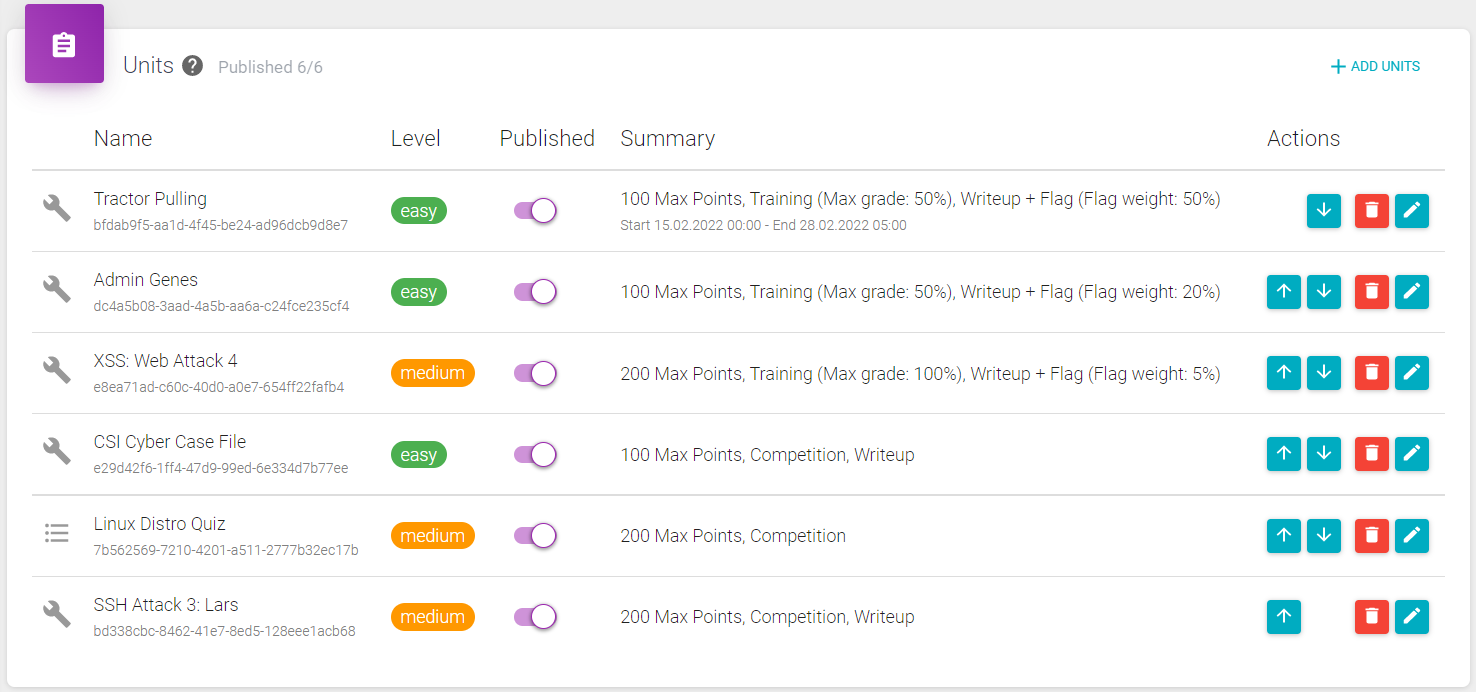
The Units section lists all challenges, theories and quizzes assigned to the event. Basic properties are displayed and several actions can be performed.
Use the + ADD UNITS link in the top right corner of this section, to add challenges, thories or quizzes.
Additionally, units can be published, ordered  , removed
  and edited
  .
.
By editing a unit, several properties can be set and changed.
In the Date Limit section, the begin and end date of a unit can be set.

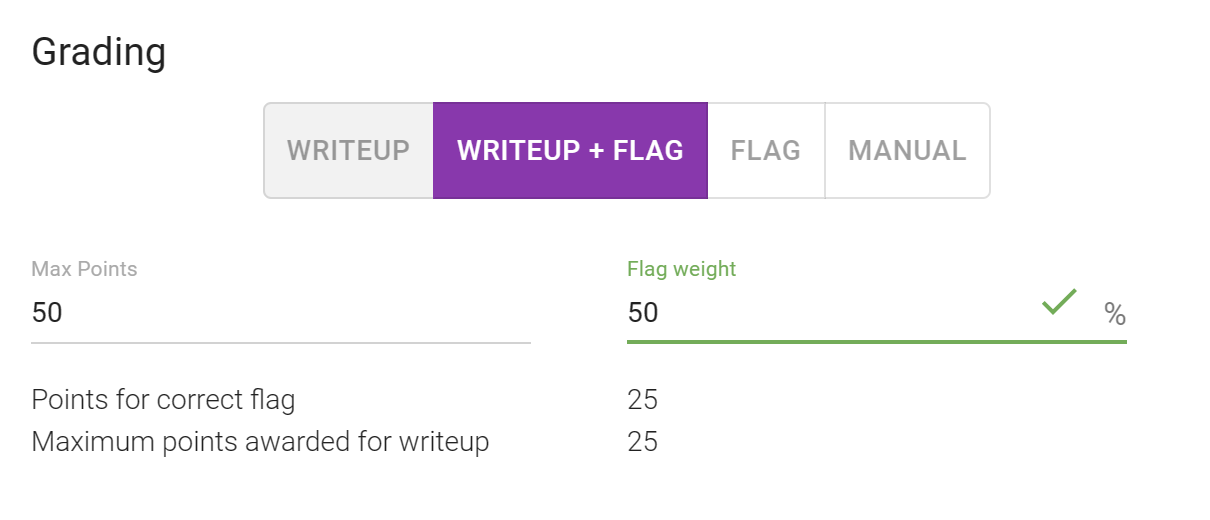
In the Grading section, the grading can be set. Depending on the grading type, a student has to submit a Writeup, a Flag or both (Writeup + Flag). The maximum points to be achieved can be defined. And for the Writeup + Flag option, the result can be weighted.
Hint
Not all units support all grading options. If no flag is provided for a unit in the editor, only writeup can be selected here.
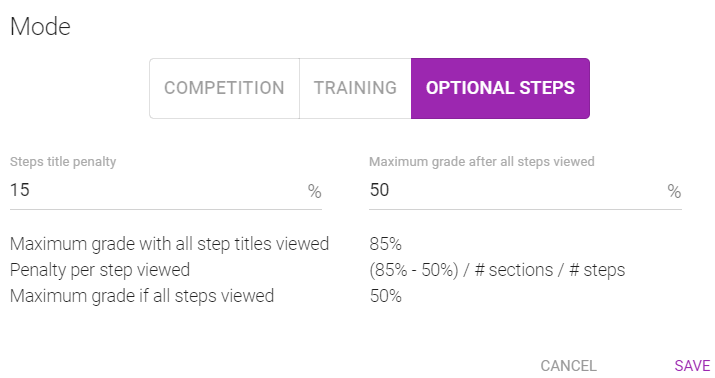
In the Mode section, one of four modes can be chosen.
For Trainings, the maximum total points to be achieved – defined in the grading section – can be skaled.
In the Optional Steps mode, "penalties" can be defined students will have to accept if they would like to see either the step titles (already providing some information) or the content of individual steps. Students can then give up points in order to view the step titles and – once they've identified where they are stuck – to access the contents of the relevant step(s) individually.
Sub-Events
(for curriculum events)
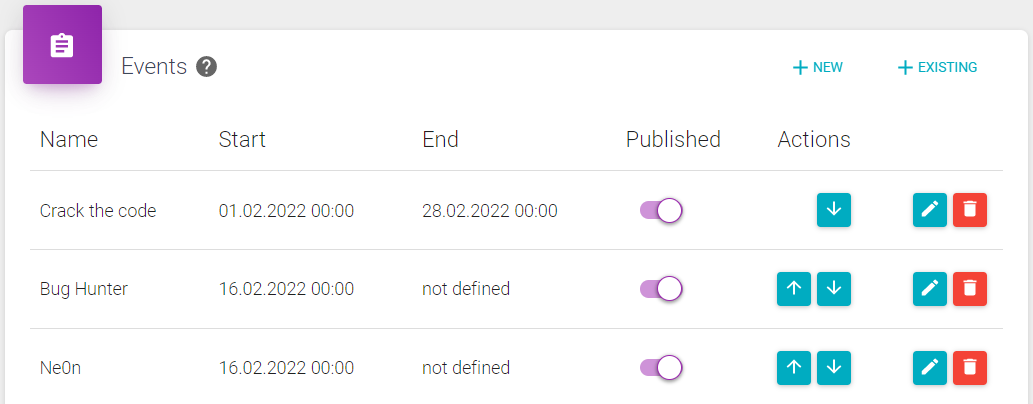
The Events section lists all sub-events assigned to the curriculum. Basic properties such as the start and end dates are displayed and various actions can be performed, such as (un-)publishing the individual sub-events.
At the top right of the screen there are two ways to add new sub-events. +NEW allows to create new events. With +EXISTING already existing events can be selected.
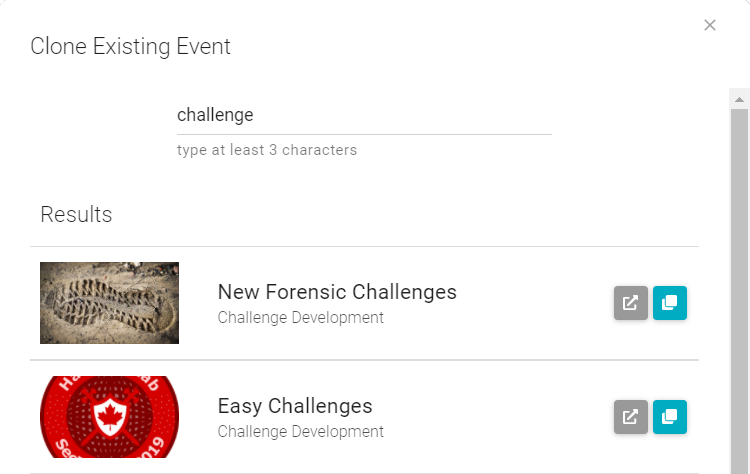
When adding an existing event a list of available events will be shown. Filter the list by name, open the event in a new tab  to preview or add a 1:1 clone
  of the curriculum.
User Assignment
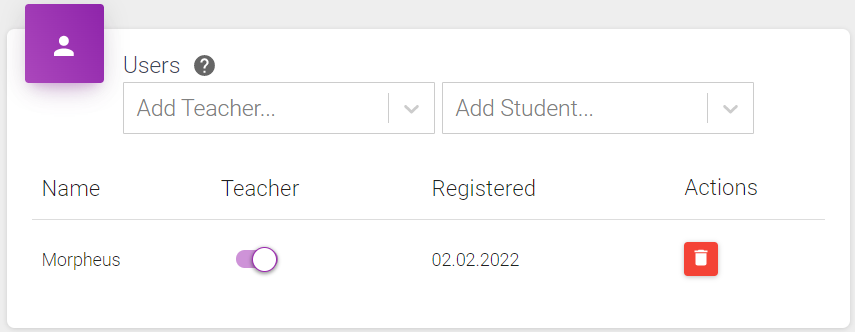
The Users section shows the users registered for the event. This section serves two purposes:
- register the teacher(s) to the events
- manually assign users to the event
Users can register themselves to the events, by the team membership. However, sometimes it can be required to add additional users, which are not member of an assigned team, to an event.
Team Assignment
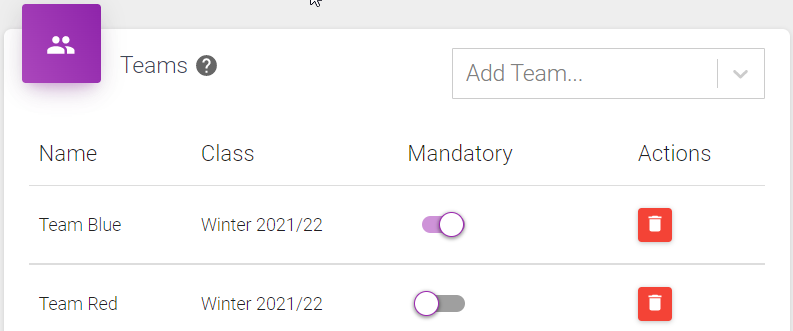
The Teams section shows the teams assigned to the event. As soon as a team is assigned, its members can see the event, and register for it. The event can be marked mandatory or optional for the team. Only mandatory events show up in the reports.
Access and Static Tokens
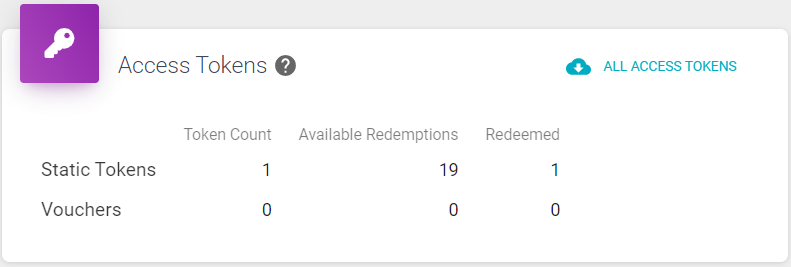
Tokens are needed by users to access private events. Depending on the ACCESSIBILITY settings of a curriculum or a basic event a single STATIC TOKEN or multiple VOUCHER tokens can be used to access the event.
A list of all tokens can be downloaded with the ALL ACCESS TOKENS link at the top right.
Initially, a static token is generated automatically. This token can be viewed – to copy and send users – and edited by clicking the  button.
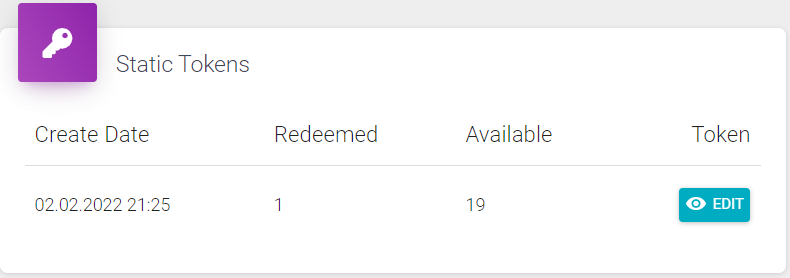
A custom static token can be chosen and the maximum number of times this token can be used to redeem access can be set.
Note
User-defined static tokens can only contain characters from the BASE32 alphabet (RFC 3548), i.e., Charachters from A-Z and 2-9. The digits 0 and 1 are not used, as there is a risk of confusion with the letters O and I when reproduced in writing. The dash - charachter is allowed as well.
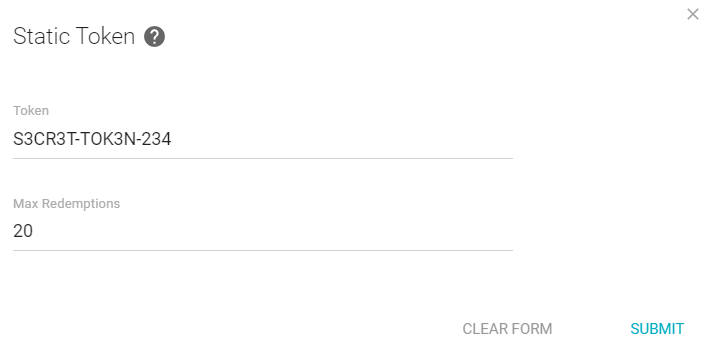
If the accessibility is set to voucher, an arbitrary number of voucher tokens can be (re-)generated in the access token section.

User Management
In this section managers can view and edit details of users.
User List
This screen shows all users available in the system.
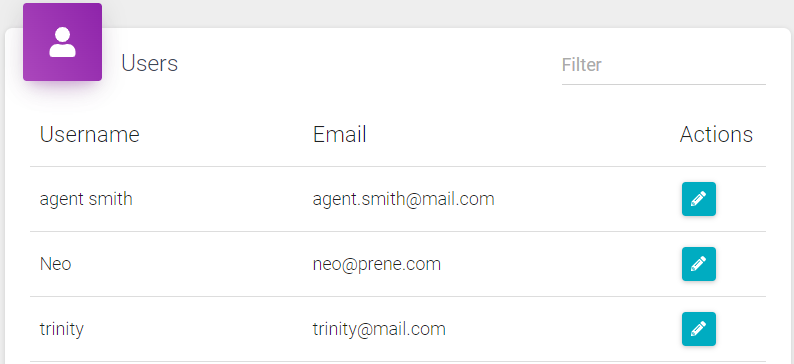
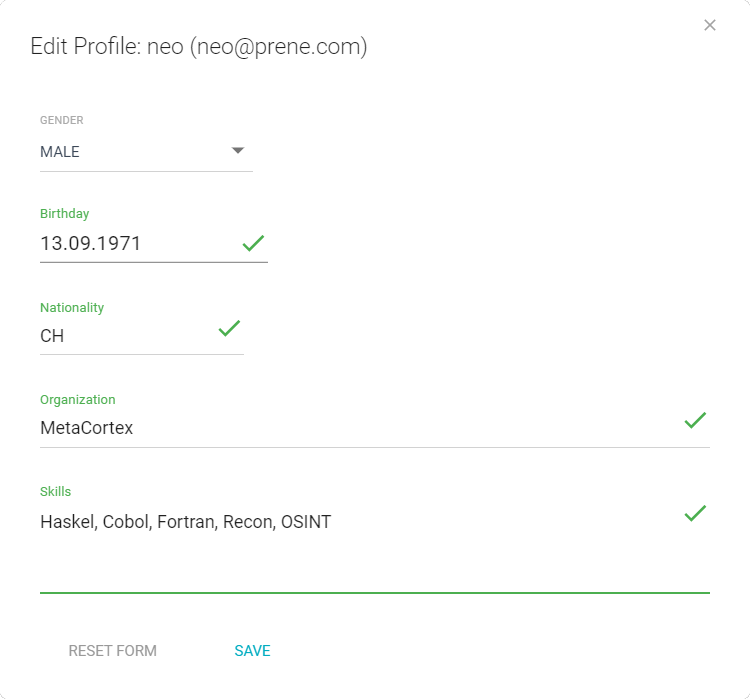
Clicking the  button, the profile of a user can be viewed and updated.
User Profile
The user profile consists of the following items:
- Gender: male or female
- Birthday: date
- Nationality: 2-character code, e.g. CH
- Organization: name of school or company
- Skills: special skills of the user, free text
All items are optional.
VM Management
This screens shows the list of all available VMs (Virtual Machines). As a manager, one can start and stop the VMs, e.g. when a VM is broken.
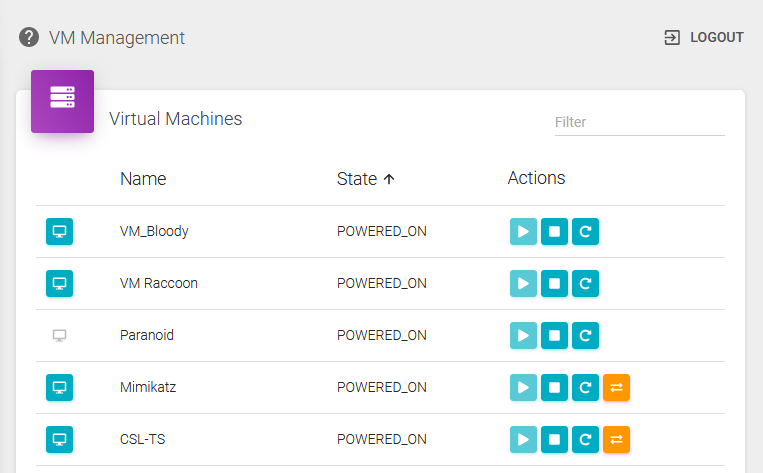
Each VM in the list is shown with its name, its status (POWERED_ON or POWERED_OFF), and buttons for modifying the VM.
Note: there are two types of VMs available:
- VMs with a memory snapshot.
- VMs without a memory snapshot.
The following buttons exist. WHich buttons are active, depends on the status and the type of a VM.
 START
START- starts a VM
-
only active when VM is powered off
-
 STOP
STOP - stops a VM
-
only active when VM is powered on
-

- resets a VM (stop + start)
-
only active when VM is powered on
-

- reverts the VM to the memory snapshot
-
only shown for VMs with a memory snapshot
-

- opens a popup with user parameters
- only shown when such (optional) parameters exists